I wish to thank all of my followers and page viewers for visiting my blog throughout the past year. I would especially like to thank all of you who replied or commented on the posts. Your questions and comments help me become a better communicator of information. I hope many more of you will jump in and get your feet wet in this wonderful activity, be it for a craft or to develop your artistic skills.. We have come so far in our search for knowledge about natural dyeing and printing. We have re-discovered many lost methods and recipes that were lost with the collapse of the Guild System, and after the Wars where women no longer passed information down to their daughters about many homecrafts. We have a long way to go, but with the amount of renewed interest, I am certain that we will soon learn many of these lost secrets, and develop new methods of working. This is not localized interest, there is a renewed effort around the world to make dyeing more natural and less chemically produced, for the Earth's sake as well as our own. Thank you all again for your continued interest.
Wednesday, December 31, 2014
Wednesday, December 24, 2014
Merry Christmas and Good Printing in the New Year!
I would like to take a moment to say thank you to all of my friends and students who have made my year a wonderful time in my life. Without your help and encouragement, I could not have reached so many goals in the past year. We have come a long way since we started in 2009 and it is because so many people have helped and shared that this was possible. Your desire to learn and your stamina during workshops are to be applauded. Today my blog went over 32000 views! Thank you all so much. Merry Christmas and Happy New Year.
 .
.
Thursday, December 18, 2014
It's that time again!
Just a reminder that my next workshop is December 21, 2014 at the Pioneer Florida Museum. If you need more information, contact the Museum at 352-567-0262
Sunday, November 23, 2014
Workshop part 7!

We don't know what plant material gave this lovely strong yellow,
but it penetrated 4 pieces of paper

Interesting print from Bottlebrush leaves
picking up the strong yellow color.

Everyone thoroughly enjoyed their Indigo/Cochineal workshop,
and are anxious to venture into it even further. We had a lovely day
and a great group of students! Join us again, won't you?
Workshop part 6!

Another of Lee's lovely paper prints

Jill Svoboda's 1st time paper prints

Jill & Mary Ann anxiously await
prints coming from the cook pot.
Workshop part 5!

Lee removes plant material from paper prints

One of Lee's lovely paper prints.

Mary Ann is a 1st time student, these are her 1st paper prints.

Kath Hay's Euca prints on silk
Workshop part 4!

Lee Gates helping with removing fabric from cochineal Vat

A few Cochineal samples

More indigo samples
Workshop part 3!

Ferrous Vat-dyed pieces were darker than the Fructose Vat-dyed

Cochineal Vat

Silk coming out of cochineal vat
Workshop Part 2!

A few samples of the indigo dyeing and an overdyed piece of Shibor

Marilyn rinses her Ferrous vat dyed piece.

Jill Svoboda rinses her first ever indigo dyed piece. Look at that smile!

Workshop photos from Nov 16, 2014...!
As promised, here are a few photos from the last workshop. I'd like to thank Nancy B. Greenland for taking the photos for me so I could stay with the students during the workshop.


 |
| Fructose Indigo Vat |
Amy removing cotton gauze from indigo vat
Amy rinsing cotton gauze after dyeing
 |
| Amy wearing her indigo dyed cotton gauze as scarf |
Friday, October 31, 2014
Know how to "Burn Test your fabrics???
The same question comes up repeatedly, How can I tell what a fabric is made of? Whether you are buying old garments or yard goods, here is a method to use in determining what fibers your fabric is made of. There is a chart in the article by Threads Magazine that you can print and keep for your files. Knowing what family of fibers your fabric is made of willl solve many of your eco printing problems before they arise.
http://www.threadsmagazine.com/item/31497/how-to-identify-fabrics-with-a-burn-test
http://www.threadsmagazine.com/item/31497/how-to-identify-fabrics-with-a-burn-test
Wednesday, October 8, 2014
Testing the Merits of your dye extractions!
I had a wild cherry tree fall down in my yard during a rain storm, and I decided to cook some of the fresh leaves to see what dye pigment if any they would give. I filled a 6 qt. stockpot with leaves and added a gallon of rain water. I brought the pot ot a boil and let it boil for 20 minutes. I reduced the heat to simmer and let the leaves simmer in the covered pot for 1 hour. It appeared that I had a light yellow extraction I added a piece of copper pipe to the pot and left it to sit overnight. The following morning, I collected some empty jars and put 100 ml of the dye extract in each jar. The each jar I added 1/4 teaspoon of a different additive. I first made test samples with the cold solution on white paper towelling. Next, I heated each jar in the microwave for 1 minute and took another sample with the paper towelling. I hung each pair side by side, labeled with the substance that had been added. When they were dry, I snipped off a small square of the towelling and used them as samples for my Test Record. The accompanying photo show the additive, the hot and cold samples, the date, because I want to know the time of year I obtained the pigments from the leaves. I also made notes to myself of the procedure used. Lastly, I remembered to take a sample of the unadulterated base color. This sample was after 3 days in the pot, I should have made a sample of the fresh dye extract for comparison, but I forgot. I hope this is helpful in allaying your fears of making the Gerber tests for your pigments. They can save you much time and worry.
.JPG)
Sunday, April 27, 2014
Proud of my student's work!
Nancy Greenland is one of my special students. She too is fearless. Her imagination starts spinning new webs from the moment she awakens in the morning.Here are some photos of her work from the last workshop at the Pioneer Florida Museum. She has turned them into mxed media pieces and created things with her prints that can be used in everyday circumstances. I hope you enjoy them as much as I do.


A lovely eco print on felt with tree trunks added with a
Sharpie pen after the print dried.
Another eco print on felt, that was wrapped around a tin can during cooking.
After drying the print was mounted on a scrap of wool felt then a canvas frame was wrapped with black wool felt and the eco printed piece was stitched to it. Nancy thought the finishing nails looked like an old fence, so she stitched a flock oof birds landing on the posts. The tree is 3-d. It is made from a group of the wires from a steel belted radial tire. This tree was used to print on the next photo piece, then appliqued to this printed background. Red running stitches in two rows accent the piece and repeat the color of the bird.
Another piece of eco printed felt, wrapped around a tin can with an impression from the tree in the photo above.Like in the photo above, the piece was mounted to a scrap of wool felt then appliqued to a larger piece of felt wrapped around a canvas frame. Both of these pieces were gifts to me at he last workshop.
This lovely print of Turkey Oak leaves and Lquidambar leaves with a small scrap of chicken wire on beige card stock was mounted on a black blank card. A piece of white unlined bond paper was appliqued to the interior for writing on. It has a black envelope and is really elegant.
This is just a lovely piece of eco printing on felt turned into a mixed-media piece with buttons applied to the surface, a tiny stitched bird. The impression from the metal tree was not strong enough, so Nancy stitched a twisted trunk and branches. Finishing nails and a couple of pieces of wire printed the fence once again.
This lovely card has an eco print mounted on black card stock, then mounted again on brown card stock. The card was run through an inj-jet printer and the work "thanks" was printed on the print. Metal washers that had been distressed were glued on the front in a curvy pattern
This lovely print of Oak and other crumbled dried leaves was eco printed on beige card stock. The print was put through an inkjet printer where the crow photo was printed. The print was then mounted on black card stock. Is is absolutely lovely!
Saturday, April 26, 2014
New Books on the shelf!
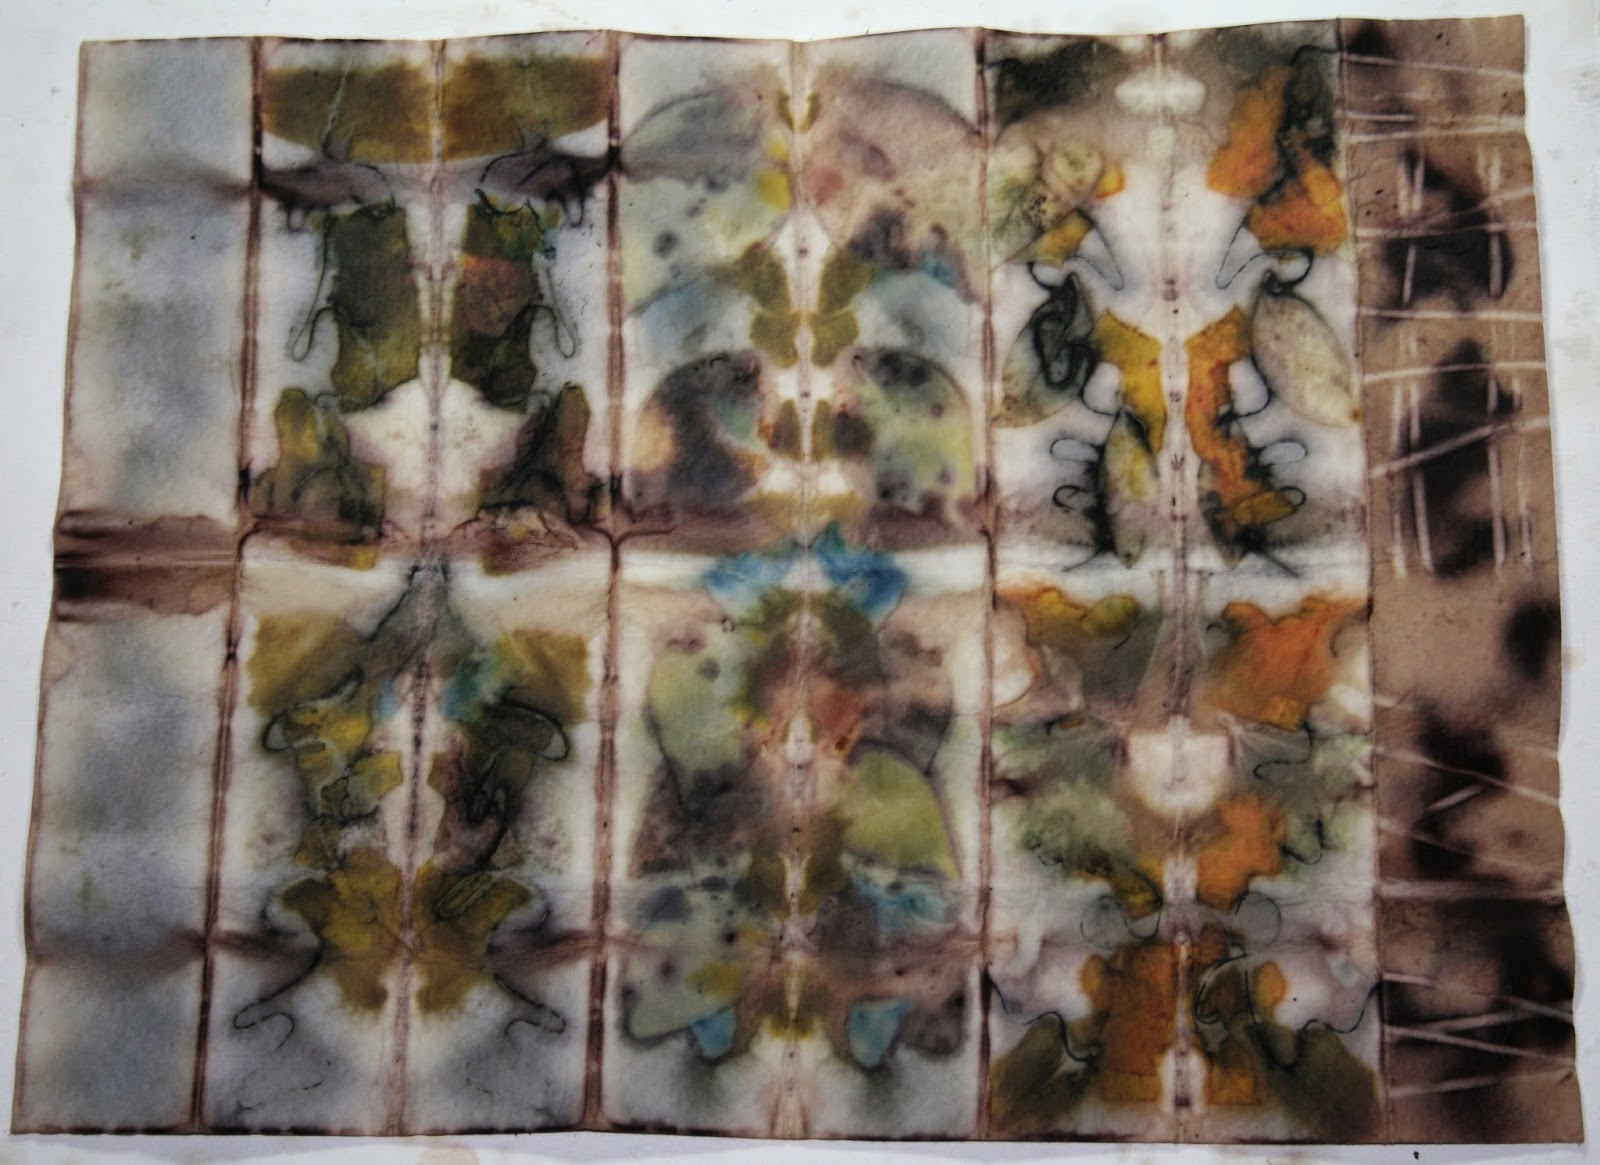
I just took two new books out of the cook pot yesterday and I'm still doing the happy dance. I achieved some incredible color and prints. I included vintage doilies along with plant materials for the first time and both printed on the water color paper. The large one is 7.5 inches x 11 inches, on Rives BFK cold pressed, 140 lb., the other is 4.5"x6" on Strathmore 400 series watercolor 140lb. cold pressed. Both cooked in the same dye pot and bath, but you couldn't tell it by the color achieved. Red and blue flower petals are usually quite fugitive for me, but this time I was rewarded with small miracles. I have never ever gotten such a bright yellow, and no metals were used in the bath, some tiny steel wires were used on a couple of the prints, and some of the doilies had been previously printed using the steel wires, but nothing prepared me for such bright yellows. I hope the photos can do them justice. They really are lovely.

.JPG)
Friday, March 14, 2014
Thank You!
My blog went over 20,000 views this morning. I couldn't believe how many people have seen my pages! Thank you all for your visits and your comments. We have come a long way. When I returned from Europe two years ago next month, only 3000 people had viewed my blog in 3 years. It shows the interest in our art and processes. Again, thank you.
Crazy for Cranesbill!
Driving home from shopping, I noticed a large clump of wild cranesbill (Geranium dissectum) growing on the side of the road. This is an invasive species where I live, so I didn't mind pulling it up to try printing with it. I used a two fold-4 page card of 140# watercolor paper, and soaked the paper in water/vinegar mixture. I decided to place the Geranium leaves in a container of washing soda/water that I had left over from mordanting some papers. I created a stack between two ceramic tiles and steamed the stack in the pressure cookeer on a rack above the water for 10 minutes. The single page of leaves had no washing soda. The double page print had washing soda and produced 3 colors. Less color without the washing soda.
The second print was on a white cotton handkerchief with crocheted edging and soaked in vinegar/water.. I used cranesbill leaves without soaking the leaves, and added two fine steel wires. Not as much color, but reaction of leaves to iron made nice edges and a hint of purple/black.


The second print was on a white cotton handkerchief with crocheted edging and soaked in vinegar/water.. I used cranesbill leaves without soaking the leaves, and added two fine steel wires. Not as much color, but reaction of leaves to iron made nice edges and a hint of purple/black.
Dilly Dallying with Doilies!
I was inspired by the work of Giedra Dagiliene and Jeanne H. McLaughlin who have been experimenting with using doiles in their Eco Dyeing, I decided to try Eco Printing on 2 vintage cotton doilies myself. I used the leaves of Liquidambar (Sweet Gum) and some rusted wire. The two doilies were stacked and steamed between two 6" ceramic tiles in the pressure cooker on a rack above the water for 10 minutes. After cooling, the vegetable mater and wire were removed and the prints allowed to dry. Here are the printed doiles.


Saturday, March 8, 2014
New "produce" for canning, Books and Prints!
Going one step further from canning dye extracts and leaves or barks, I tried my and at making paThe rest are saved for my workshop on the 23rd of March.


Have you canned your prints lately!
India Flint has published a Blurb book called Stuffed Steeped & Stored. In it she describes a way to color and print fabrics, and papers using a minimum of fresh plant material. If you are familiar with canning or preserving using the Hot Water Bath canning method or Pressure canning, you can do the same thing. I grew up helping to can and preserve produce and jams and jellies with my family since I was about 10 years old. My first canning experience with dyeing was back in July 2011 when I placed fabric and cosmos dye in a quart jar and sealed it to see if the dye would take. It did. In May of 2011, I canned 12 quarts of vegetable material to make my own dye extracts. Those jars are still sealed today, except for one. A jar of Eucalyptus bark became unsealed. There is no sign of mold or mildew inside that jar 2 years later. Could it be because Eucalyptus is both anti-fungal and Anti-bacterial? Here are some photos of the canned dyestuffs:
 |
| 2 bQts. of Elderberry extract from 2012 |
 |
| Left, Mullien extract, right, Eucalyptus bark extract, both from 2012 |
 |
| Lt. to rt.: Elderberry extract, new Eucalyptus bark extract, cosmos extract and 2012 Eucalyptus extract |
 |
| 12 quarts of dyestuffs from 2012, still unopened and stronger in color. |
A Post-printing Dip!
I accidentally stumbled upon a new treatment for problem prints. I recently printed some small prints using Psidium catteleianum (Cattely Guava) and a few other mixed flowers and leaves. The Psidium prints for the most part were successful. A couple did not have enough detail along with some of the flower part prints. I decided to use a post dip bath like I do with fabric sometimes, and made a mixture of 2 cups hot water, 2 cups cold water and 2 tsp. of washing soda. After I dissolved the washing soda completely, I dipped my paper prints that had problems in the washing soda/water mixture and took them out quickly. Boy what a difference in color was visible right away! I allowed the prints to dry and photographed them. Here are the finished photos:


Subscribe to:
Posts (Atom)